GRUNDIG GCB-1 Pedelec with Bafang mid-motor and torque sensor
From T.LaneTonya
GRUNDIG GCB-1 Pedelec with Bafang mid-motor and torque sensor
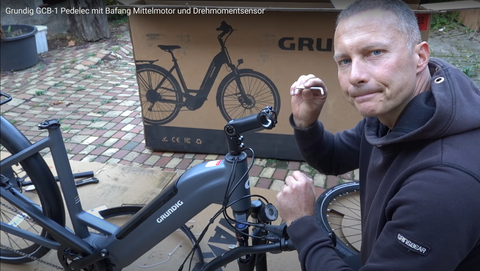
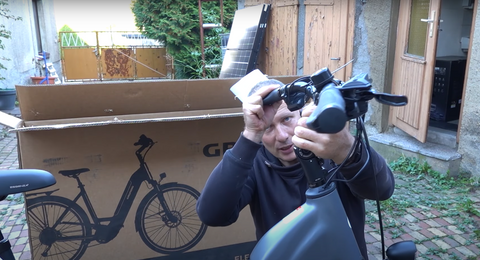
An e-bike with a mid-engine from the well-known company GRUNDIG is presented in this article. The bike is brand new on the market and weighs 28kg. The video shows how the bike is unpacked and assembled. The packaging is good and there is no damage during transport. The accessory box contains tools, pedals, a bell and the charger.
The handlebar assembly is shown as the first step as it is very simple and self-explanatory. All components on the handlebars are already pre-assembled and care must be taken to ensure that the cables are not twisted. The saddle is also assembled and aligned later. Installing the front wheel is easy and all you need to do is position the springs and lever correctly. The mudguard and the bell are also installed.
Packaging and unpacking
The GRUNDIG e-bike is delivered in a box that comes standard with the front wheel removed and the rest largely assembled. The weight of the bike is 28 kg. The packaging looks good and there are no signs of damage in transit. The accessory box contains tools, pedals, a bell, the axle and the charger.
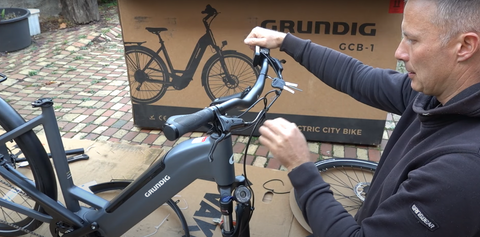
Installing the handlebars is easy and self-explanatory once you've done it a few times. All four screws at the front must be unscrewed in order to mount the handlebars on them. All components on the handlebars are already pre-assembled. You have to be careful not to twist the construction cables.
The display and gearshift are on the side. You have to be careful not to twist the cables. The handlebars are screwed on, but not really tightened yet, just so that it is on. The whole thing will be aligned again later and the height of the brake handles may need to be adjusted.
It is important not to tighten the screws too much, but to do everything with feeling. You shouldn't tighten the screws all the way. The axle is mounted with a 15 key. The bike has hydraulic disc brakes and there are always such securing plastic layers. You have to be careful not to apply the brakes, otherwise the shoes will contract and not come apart again.
The mudguard and bell are installed after the wheel is inserted. The handlebars have an adjustable stem that can be adjusted in inclination. You have to loosen the screw at the bottom to adjust the stem. If the handlebars are not aligned, you can adjust the height here with the two screws.
The e-bike from GRUNDIG with a mid-engine was borrowed and is presented in this video. The box has not been opened, but it appears that the front wheel is removed and the rest is already installed. The speaker begins by assembling the handlebars, emphasizing that it's easy and self-explanatory once you've done it a few times. All four screws on the handlebars must be unscrewed so that the handlebars can be installed. All components on the handlebars are already pre-assembled. The only thing you have to be careful about is not to twist the construction cables here. The speaker shows how to mount the display on the side and the gearshift on the side. There are cables that must not be twisted. The handlebars are screwed on first, but not yet fully tightened. The whole thing will be aligned again later. The screws must not be tightened too tightly, but rather with feeling, usually with a wrench. The speaker also has one, but until now he has always done it by hand so that the gap between the two bells is even at the top and bottom. Assembly is very important to ensure everything is aligned correctly.
Saddle assembly
When assembling an e-bike with a mid-engine, installing the saddle is an important step. First, the saddle with spring support must be pushed in so that the bike stands better. The bike can then be turned over to install the front wheel. It should be noted that the bike has hydraulic disc brakes and the brake pads must not be operated to avoid damage.
After the front wheel has been mounted, the mudguard and bell can be attached. Make sure that the front light is mounted behind the fork. The bell can be attached with a Phillips screwdriver.
The handlebars of the e-bike have an adjustable stem that can be adjusted depending on your body size. To do this, the screw at the bottom of the stem must be loosened to change the inclination of the handlebars. The handlebars can then be realigned and tightened.
Overall, saddle assembly is a simple step when assembling a mid-engine e-bike. It is important that the screws are not overtightened and that the components are assembled carefully to ensure a safe and stable bike.
Assembling the front wheel
The mid-engine e-bike from GRUNDIG is available for just over €2000 and is brand new on the market. The video shows how the bike is unpacked and assembled. The front wheel is removed as standard, but the rest appears to be installed.
Installing the handlebars is easy and self-explanatory once you've done it a few times. You have to unscrew all four screws here at the front so that you can get the handlebars on. All components on the handlebars are already pre-assembled. The only thing you have to be careful about is that you don't twist the construction cables or anything like that. The handlebars are screwed on first, but not really tightened yet, just so that it is on. The whole thing will be aligned again later. If necessary, you may have to adjust the height of the brake handles again.
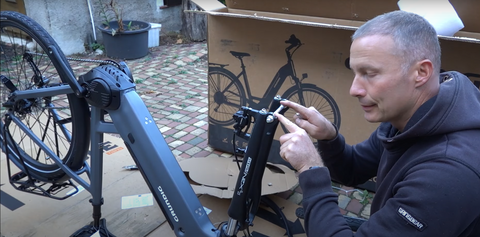
The display is first turned to the side so that it is free up here and the bike can be completely turned over. The axle is taken out and then the front wheel is simply put on here, with the disc in between, of course. Then everything is tightened with sensitivity so that at the end the tensioning lever can be pressed easily, not too tight, not too loose. The disc grinds minimally, but that's normal and completely okay.
The mudguard is mounted behind the front light, which is a strange way to mount it on some bikes, but here it's done that way. The mudguard is simply put on here and then screwed tight using a washer and nut. Before the whole thing is completely screwed down, it is attached to the side. The screws are already prepared, self-locking nuts are used.
There are no tools included for the bell, but a normal Phillips screwdriver from the household is sufficient. The handlebars have an adjustable stem that can be adjusted in inclination. To do this, you have to loosen the screw underneath with an Allen key. Then you can adjust the inclination and tighten the whole thing again. With this stem you always have to loosen the screw down here and then you can align it really well.
Pedal assembly
The GRUNDIG e-bike is delivered with the front wheel removed as standard. The rest appears to be assembled and the bike weighs 28kg. The handlebar is pre-assembled and just needs to be screwed on. To do this, all four screws at the front must be unscrewed so that the handlebars can be attached to them. The components on the handlebars are already pre-assembled and care must be taken to ensure that the cables are not twisted. The display and gearshift are on the side. There are cable connections that must not be twisted. The handlebars have to be screwed on first, but not yet fully tightened so that they can be aligned later. The brake handles must be adjustable in height if necessary.
It is important that the screws are not tightened too tightly, but rather gently and evenly. The display must be turned to the side so that the bike can be completely turned over. The axle is for safety so that the fork is not damaged during transport. The hydraulic disc brake is equipped with a plastic lock that must be removed before attaching the wheel. The brake must not be applied, otherwise the shoes will come together and not move apart again. The wheel is simply put on and the disc is threaded in between. The springs must be mounted on the left and right and the lever always goes on the side where the brake disc is not located.
The pedals must be installed with a size 15 wrench. The left pedal is mounted to the left and the right pedal to the right. The mudguard is mounted behind the front light and screwed tight with a washer and nut. The screws are self-locking and the nuts must be tightened with sensitivity. The handlebars have an adjustable stem that can be adjusted depending on the size of the rider. The inclination can be adjusted below the stem by loosening the screw. The handlebars then still need to be aligned.
Pedal assembly is relatively easy and self-explanatory once you've done it a few times. Only a few steps are required to assemble the pedal.
Mounting the mudguard
This video shows how to unpack and assemble a GRUNDIG mid-engine e-bike. The bike weighs 28 kg and the front wheel is removed as standard. However, the rest of the bike appears to be already assembled. The speaker starts with the handlebar assembly, which he describes as simple and self-explanatory. First, all four screws on the handlebars must be unscrewed so that the handlebars can be put on. The components on the handlebars are already pre-assembled, so you just have to make sure that the cables are not twisted. The spokesman recommends initially only screwing the handlebars so that they are in place and then aligning them later.
Next, the display is mounted on the gearshift side. The cables do not have to be twisted. The speaker points out that it is important not to overtighten the screws and to adjust the height of the brake handles if necessary.
The bike has hydraulic disc brakes, so the securing plastic layers must be removed before putting the bike on. The speaker emphasizes that the brakes must not be applied, otherwise the shoes will come together and cannot be released again.
The mudguard is simply plugged on and screwed tight with a washer and nut. The distance can be adjusted if necessary. The bell is mounted with a Phillips screwdriver.
The handlebars have an adjustable stem that can be adjusted in inclination. To do this, the screw at the bottom must be loosened. The speaker shows that the tilt of the handlebars can be adjusted according to body size.
Overall, only a few steps are necessary to assemble the e-bike. The speaker emphasizes that it is important not to overtighten the screws and to do everything with feeling.
Bell installation
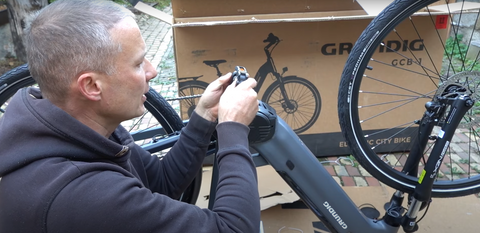
This section describes how to install the bell on the e-bike. It should be noted that no special tools are required for installation. An ordinary household Phillips screwdriver is sufficient.
First you need to use the screwdriver to loosen the screw on the doorbell. The bell is then attached to the handlebars and the screw is tightened again. It is important to ensure that the bell is securely attached to the handlebars to avoid falling while riding.
After installing the bell, the e-bike can now be used safely and with a working warning signal.
Handlebar adjustment
When assembling an e-bike, installing the handlebars is one of the first steps. It is important that the handlebars are properly installed and aligned to ensure a safe and enjoyable riding experience.
First, all four screws at the front of the handlebars must be unscrewed in order to be able to put the handlebars on. All components on the handlebars are already pre-assembled, so you should make sure that the cables are not twisted.
The handlebars should only be screwed slightly tight at first in order to be able to align them. If necessary, the height of the brake handles must also be adjusted. It is important not to overtighten the screws, but to do everything with sensitivity to avoid overtightening.
The display should be turned to the side to make room and be able to turn the bike around. The saddle should also be pushed in to better stabilize the bike.
The axle should be removed carefully to avoid damaging the hydraulic disc brakes. The brake does not need to be applied to prevent the shoes from contracting. The wheel should simply be put on and the disc threaded in between. The springs should be installed on the left and right and the lever should always be on the side where the brake disc is not located.
The pedals should also be attached and care should be taken to ensure that the bike is on the left and right of the pedals. The #15 wrench should be used to tighten the pedals.
The fender and bell should also be installed, making sure the front light is mounted behind the fork.
Finally, the handlebars should be aligned and screwed tight again. It is important that everything is done neatly and with sensitivity to ensure a safe and pleasant driving experience.